
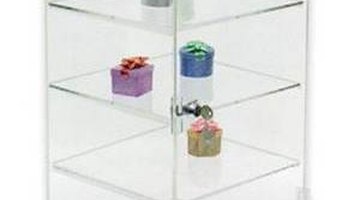
How to Build a Plexiglass Display Cabinet

Plexiglas is a brand name of sheet acrylic. Working with Plexiglas is fun and easy. Plexiglas is a wonderful material for constructing just about anything. It is affordable, durable, shatterproof, lightweight, easy to work with, simple to cut, easy to glue and beautiful to look at.
With just a few tips, you will be on your way to not only constructing a display cabinet from Plexiglas, but anything you can possibly imagine.
Things You Will Need
- Plastic sheets
- Square
- Tape (painters tape works well and leaves no residue)
- Table saw, circular saw, router, band saw or plastic cutting knife
- Acrylic cement
- Sand paper
- Electric sander
- Map gas torch (optional)
- Epoxy or hot glue (optional)
-
Choose a design for your case. These instructions will show you how to make a basic box-style case, but you can make your case in any shape and size.
-
Use a cutting tool to cut six equal-size squares from Plexiglas. These can be whatever size you need. Stabilize your Plexiglas sheet well during cutting to minimize vibration, which can cause rough edges as well as melting. Be sure your Plexiglas squares are perfectly square.
-
Use the electric sander to smooth the cut edges to be perfectly flat. Rough edges will negatively affect the bonding while gluing. Don't round your edges, which will also negatively affect your glue bond.
-
Use the tape to assemble five of the six pieces into four walls and a lid. Use only two pieces of tape per side. The glue you will be using wicks under the seam between the pieces, so covering the entire seam in tape will prevent you from being able to apply the glue properly.
-
Use the acrylic cement to glue your pieces together, according to package directions.
-
Let the project dry overnight. Maximum hardness is achieved in 24 to 48 hours.
-
Glue your item to be displayed to the remaining sheet of Plexiglas using epoxy or hot glue, if desired. This will prevent your collectible from moving around in the case.
-
Put your collectible into the case, either freely or with the bottom Plexiglas sheet attached. Position the final side of your Plexiglas cube and tape. Remember to use two pieces of tape per side.
-
Glue the final side down. Let dry overnight.
-
Run a map gas torch along each cut edge for a smooth, glass-like finish, if desired.
The Drip Cap
- Plexiglas is a brand name of sheet acrylic.
- Stabilize your Plexiglas sheet well during cutting to minimize vibration, which can cause rough edges as well as melting.
- Use the electric sander to smooth the cut edges to be perfectly flat.
- Use only two pieces of tape per side.
- Let the project dry overnight.
- Glue your item to be displayed to the remaining sheet of Plexiglas using epoxy or hot glue, if desired.
References
Writer Bio
Shelley Kishpaugh has written numerous articles for Demand Studios and Helium on a wide variety of topics, and she is currently writing a children's book. Kishpaugh received a B.S. in psychology from the University of Colorado and has been writing professionally since 2007.
More Articles