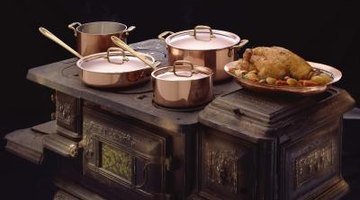
How to Clean & Polish a Cast Iron Antique Cook Stove
Cleaning and polishing an antique cast iron cook stove is a routine monthly chore for anyone who uses such a stove regularly. Cast iron is sensitive to water, which will create rust, so the old-fashioned cleaning methods using brooms, oils, rags and stove black are still best for these antiques. Cast iron responds wonderfully to heat, which means most of your cooking drippings will simply burn away with each use. Clean and polish your cast iron cook stove on a day when you’re not using the stove, and have let the stove cool down completely overnight.

Step 1
Remove all accessories and removable parts from cold cook stove. This includes oven racks, warming oven doors, burner caps, cap hook and water reservoir. Set them aside on newspapers or an old sheet.
Step 2
Empty the ash box completely. Use the burner cap hook to scrape around the edges and rim. Remove the wood grate and set aside.
Step 3
Roll up a sheet of newspaper. Daub it in olive oil or bacon grease. Use it to scrub off any baked-on residue that hasn’t burned off the cast iron.
Step 4
Brush the stove down with a soft-bristled broom. Start at the upper left corner and move down to the stove legs. Work left to right. Sweep out any ash box residue.
Step 5
Brush out warming oven and baking oven. Use a toothbrush to gently dig out sooty build-up in corners and inside doors.
Step 6
Sweep, then vacuum all around, under and inside the antique cast iron cook stove to remove fallen dust and debris. Vacuum the top of the baking oven by inserting the vacuum extension attachment into the open burner holes.
Step 7
Brush and vacuum each piece you removed at the project’s beginning. Separate the cast iron pieces, such as the burner caps, from the nickel-plated or copper pieces, such as the hot-water reservoir.
Step 8
Wash any painted areas or trim with a barely damp cloth. Use a clean, soft damp cloth to wash the inside of the warming oven and the hot-water reservoir.
Step 9
Apply stove polish as directed by manufacturer. Usually, this means applying the polish, also known as stove black, as you would a car wax. Allow it to dry completely then buff to a bright shine. While the polish is drying on the cook stove, apply stove black to the removable cast iron pieces, such as the burner caps and cap hook.
Step 10
Polish all of the trim and non-cast iron parts of the cook stove. Use a damp sponge daubed with commercial copper-brass cleaner to polish the nickel-played trim, door handles and copper hot-water reservoir. For porcelain knobs or trim, polish with a damp sponge sprayed with basin-tile cleaner.
Step 11
Allow the stove, accessories and all trim to dry completely. Replace the grate, oven rack and other removable parts before lighting the cook stove.
References
Resources
Tips
- Use a bit of olive oil on a clean cloth to spruce up your cook stove between cleanings.
- Keep a box of salt on a shelf near your cook stove. If you spill candle wax or some other sticky item on the cast iron stove top while cooking, douse the smoke or flame with a blanket of salt. Sweep and scrape off when stove is cool.
Warnings
- Never try to touch-up the paint on a cook stove while you’re cleaning it in place. Painting is a separate operation that is only done safely outdoors or in a garage or other well-ventilated area.
- Always check your chimney flue before relighting your cook stove. Be sure the damper is open when you set the first match to kindling or you’ll have a smoky mess within seconds.
Writer Bio
Kate Sheridan is a freelance writer, researcher, blogger, reporter and photographer whose work has appeared in numerous newspapers, magazines and trade publications for over 35 years. She attended Oakland University and The University of Michigan, beginning her journalism career as an intern at the "Rochester Eccentric." She's received honors from the Michigan Press Association, American Marketing Association and the State of Michigan Department of Commerce.
Photo Credits
- Jupiterimages/Comstock/Getty Images
More Articles


