
DIY Lattice Headboard

A lattice headboard provides a dramatic backdrop for your bed, suitable for a variety of design styles. The geometric pattern pairs with solid or printed textiles to create a light, fresh environment or a bold, contemporary atmosphere. A dark-colored lattice headboard creates a focal point in the bedroom, while a light or white headboard frame blends seamlessly with neutral walls and furnishings. With carefully selected pillows and bedding, you can design an inviting, tranquil sanctuary.
Assembling the Headboard Frame
Step 1
Measure the desired height of the headboard from the floor. Cut four pieces of 1-by-4-by-1/2-inch lumber based on this measurement. Measure the desired width of the headboard, ensuring it is wider than the bed frame and mattress. Subtract 7 inches from this measurement. Cut four pieces of 1-by-4-by-1/2-inch lumber based on this measurement.
Step 2
Lay two of the longer boards on the floor parallel to each other. Lay one of the shorter boards across and between the two boards, forming perpendicular angles. Slide it all the way to the top until it is flush with the two parallel boards.
Step 3
Measure the desired height from the floor to the bottom of the headboard. Lay one of the shorter boards across and between the two parallel boards, forming perpendicular angles based on this measurement. Attach L brackets to the inner four angles of the rectangle created to secure the boards.
Step 4
Measure the distance between the top of the headboard frame to the lower edge of the frame, not including the legs. Cut the lattice based on this dimension and the complete width of the headboard. Staple the lattice to the frame.
Attaching the Headboard and Moulding
Step 1
Stand the headboard frame against the wall approximately where you plan to place it. Find the wall studs using the stud finder and attach the frame to the wall using 2-inch wood screws every 16 inches along the frame. Set each remaining piece of lumber against its corresponding headboard frame piece and attach it with 3/4-inch wood screws.
Step 2
Measure the length and width of the headboard visible above the mattress. Cut the moulding based on these dimensions using the mitre box. Attach the moulding with 1-inch wood screws to the frame. Cut the 1 1/4-inch trim to cover the raw side edges of the headboard frame and staple it in place.
Step 3
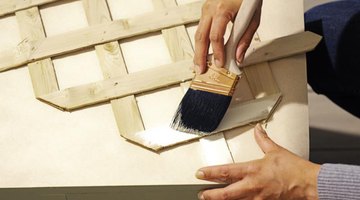
Fill any screw and staple holes with wood putty. Sand the dried wood putty smooth. Paint the headboard frame by hand.
References
Resources
Tips
- You must use a freestanding bed frame independent of a foot board and headboard for this project. Pre-drill pilot holes in the wood before fastening headboard pieces together. Follow the mitre box instructions to cut the headboard moulding.
Warnings
- Wear safety goggles while using power tools and equipment.
Writer Bio
Based in Southern California, Linda Roche has been writing local commercial spots and informational pieces for television since 1989. Her commercials have been seen on Charter Communication's Los Angeles networks. She was awarded the Audio Video Award in 2010 and 2007 and nominated for a CAB award in 2007. She holds a Bachelor of Arts in communication from California State University in San Bernardino.
Photo Credits
- Jill Chen/iStock/Getty Images
More Articles