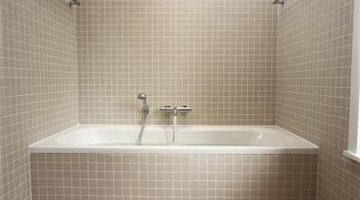
How to Install a Tub Furring Strip
Most tubs have flanges that sit against the studs surrounding it. This design helps prevent water from getting behind the tub. Tubs that have plastic surrounds rarely need any furring strips unless the framing is uneven. However, furring strips are a necessity when the surrounding walls are going to be tiled. Otherwise, the backerboard will flare out at the bottom of the tub. This can cause the tile to be out of plumb and look uneven, especially in the corners. Installing furring strips allows the backerboard, and subsequently the tile, to be installed plumb and provide a professional finish.
Installing Furring Strips

Step 1
Remove any nails, screws or debris from the studs surrounding the tub. Look at the tub flange to determine if the tub seats evenly against the studs. If there are gaps between the flange and some of the studs, then individual furring strips will need to be cut for each of those studs.
Step 2
Measure the thickness of the flange. The tub flange is the required minimum thickness for the furring strips. Two methods can be used for furring strips. 1x2 strips can be bought or furring strips can be cut from 2x4s on a table saw. If furring strips are going to be cut on a table saw, use a tape measure to set the guide at the desired thickness.
Step 3
Rip-cut enough furring strips from 2x4s to cover all the studs touching the tub flange. (Rip-cutting is the terminology used when cutting down the full length of lumber.) Most furring strips are ¼ to ¾ inches thick. Do not cut furring strips so thick that they will push the finished wall beyond the lip of the tub. The finished wall usually consists of backerboard, thinset and tile.
Step 4
Measure the height between the top of the tub flange to the ceiling. Cut the length of the furring strips at that measurement.
Step 5
Use a caulking gun to apply construction adhesive to all the studs touching the tub flange. Use finish nails to attach the furring strips to the studs. The furring strips are used as spacers. (The screws used with the backerboard have to be long enough to go through the backerboard, furring strips and at least 1½ inches into the stud.)
Step 6
Hold a level horizontally across the studs with furring strips and measure the gap between the level and the studs not touching the tub flange. Rip-cut furring strips off a 2x4 on the table saw at the appropriate thickness. Glue and nail the furring strips to the remainder of the studs.
Step 7
Use this same method to cover the studs on the side walls with furring strips.
Resources
- “Residential Framing A Homebuilder's Construction Guide”; William P. Spence; 1993
- “Setting Tile”; Michael Byrne; 1995
Writer Bio
Azrael Morherudaen has written for the Upper Peninsula's Second Wave website and CloudCrowd. He attended the University of Michigan before serving in the U.S. Marine Corps as a certified intelligence specialist.
Photo Credits
- David De Lossy/Photodisc/Getty Images
More Articles


