How to Make Pleated Balloon Shades
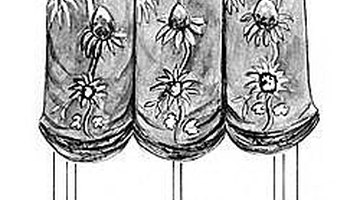
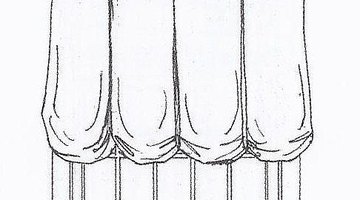
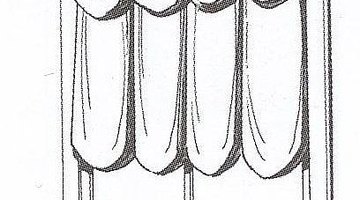
A pleated balloon shade provides a happy medium between a blind and a drapery and an ideal compromise between a casual and an elegant room. Inverted box pleats 12" to 18" apart at the top opens to a waterfall of balloon shaped poufs at the bottom.

Poufs are created by pulling up the fabric panels in the back and permanently securing in position. By pulling an attached cord, the shade can be raised exposing a portion of the window to allow light and air to penetrate.
Things You Will Need
- Fabric
- Lining
- Loop tape (with rings attached)
- Screw-eye bolts
- Lightweight traverse cord
- Cord cleat
- Mounting board
- Screws for inside mount
- L-shaped brackets for outside mount
- Staple gun
- Sewing machine, thread, pins and scissors
- Ruler and measuring tape
Tip
Contrasting fabric can be sewn into the pleats for added appeal. To make the window appear taller, mount the shade several inches above the frame allowing the shade to stack higher. This also provides more window exposure. Consider using a sheer version beneath for added privacy. Vary the lengths of the shades when raised to add interest.
Warning
To provide some protection against sun damage and fading, be sure to use lining. Lining also adds weight to the shade giving a more tailored look. Velcro may be used to attach shade to mounting board for ease in removal, however, weighty fabrics can cause the shade to sag giving a less professional look.
-
Select Mounting Type: Inside mount - provides a clean, tailored look and can dress an otherwise difficult window (bay, bow, Palladian). You need 1 1/2" unobstructed window depth for this type mount.
-
Outside Mount - used to hide unattractive moulding, to allow a small window to appear larger, hide a window out of square or when a window is not deep enough.
-
Frame Mount - a seldom used method where mounting board is attached directly to the moulding around the window. May be used when window is not deep enough to allow inside mount and wall space is inadequate for outside mount.
-
Measure Window: Inside Mount - measure opening width inside frame at top, middle and bottom, recording the narrowest width. Measure the height at left, right and center, recording the longest measurement. Deduct 3/8" from the overall width for operating clearance allowances.
-
Outside Mount - Measure width of opening, adding at least 3" to each side. Measure opening height adding 2 ½" in height for mounting and desired length for overlap at sill. No size deduction needed.
-
Determine Shade Measurement: Window measurements provide finished shade dimensions for inside mount. Add 3" to outside mount window dimensions for return allowance for privacy and increased energy efficiency. Finished length of shade is measured from top of shade to short point of the pouf, otherwise shade will not be long enough to cover window. Length of shade should have 1/3 to 1/4 of its height available for stacking.
-
Select Fabric: Balloon shades can be heavy depending on fabric weight and size of the shade. Heavier, stiffer fabrics work best if shade is to remain mostly stationary. These require more hand dressing when raised. Softer, more pliable fabrics work well with shades raised and lowered regularly and drape nicely without much attention. While vertical stripes can be carefully placed, avoid horizontal stripes. Center large patterns on each pleated section.
-
Fabrication: • Cut fabric to 2 times the finished width plus ½" for each seam allowing for 2 poufs per 24". • Cut finished length plus 1 1/2" for attaching to mounting board and 2" for hem. • Stitch widths together as needed for larger windows and to allow for pleating. • Pin fabric to lining with right sides facing and stitch around perimeter; leave opening for turning. Trim corners, turn right sides out and iron flat. • Lay lining side up, determine pleat placement, pin folds and stitch in place. • Determine vertical placement of loop tape and secure. • Draw up 3-4 loops and secure together to shade at uppermost of the 3-4 loops. • Measure and cut lengths of cord twice the height of the window. Tie each securely to bottom loops and thread through remaining loops. • Insert screw-eye bolt to mounting board at point where loop tape will touch.
-
Install: Inside Mount • Cut 1 x 1 wood to fit inside top of window opening and cover with lining fabric. • Attach top of the shade to upholstered mounting board using staples making sure staples are hidden from view. • Secure to window frame with screws through pre-drilled holes.
-
Install: Outside Mount • Use wood deep enough (approx. 2"-3") to allow shade to hang past window molding and sill. Cut to the desired shade width. Mount upholstered board with L-shaped brackets attached to wall. • Thread pull cords through screw-eyes. Install cord cleat in convenient location and wrap cord to secure in shade in raised position.


The Drip Cap
- A pleated balloon shade provides a happy medium between a blind and a drapery and an ideal compromise between a casual and an elegant room.
- Outside Mount - used to hide unattractive moulding, to allow a small window to appear larger, hide a window out of square or when a window is not deep enough.
- Measure opening height adding 2 ½" in height for mounting and desired length for overlap at sill.
- Finished length of shade is measured from top of shade to short point of the pouf, otherwise shade will not be long enough to cover window.
- Heavier, stiffer fabrics work best if shade is to remain mostly stationary.
- Center large patterns on each pleated section.
- Trim corners, turn right sides out and iron flat.
- • Mount upholstered board with L-shaped brackets attached to wall.
- • Thread pull cords through screw-eyes.
Resources
Writer Bio
This article was written by PocketSense staff. If you have any questions, please reach out to us on our contact us page.
Photo Credits
- CalicoCorners.com,
- CalicoCorners.com,
More Articles


