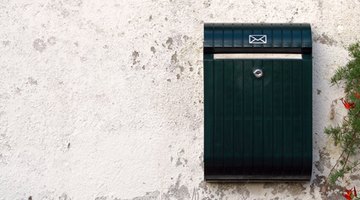
How to Install a Mailbox on a Stucco Wall
One way to improve the curb appeal of your home is to update your mailbox. Many mailboxes are mounted on the front wall of the home and are an important part of the overall look of the home. Wall-mounted mailboxes are available in a wide range of styles from minimalist modern designs to baroque, ornate pieces.

One thing that most wall-mounted mailboxes have in common, however, is that they can be installed rather quickly with a few simple tools. Anyone can install a mailbox on a stucco wall by following a few simple steps.
Things You Will Need
- Bubble level
- 1/4-inch masonry drill bit
- Electric drill motor
- 1-1/2-inch hollow wall anchor screws with sleeves
- Hammer
- Screwdriver
- Silicone sealant
Tip
Check with your local Post Office or USPS website for mounting location information.
-
Choose a location for the mailbox. Consider locating your mailbox toward the front of the home, near the driveway or along paved areas of your front yard.
-
Pre-drill holes for the mailbox fasteners. Most mailboxes are designed to be mounted on a wall by hanging on a number of screws protruding from the wall surface. Locate the screw positions by referring to your mailbox mounting instructions. Use a 1/4-inch masonry drill bit to drill holes that match the mounting pattern on the back of your mailbox. Use a bubble level to ensure the hole pattern is level.
-
Insert the plastic sleeve portion of the hollow-wall anchors into the screw holes. Use a hammer to tap the plastic sleeves into the pre-drilled holes until no part is protruding past the face of the stucco. Push a dollop of silicon sealant in the hole before and after the sleeve is positioned in the hole, especially if there is no a overhang over the wall. This will help to keep the holes weather-tight.
-
Screw the screws into the sleeves. Use a motorized screwdriver until about 1/4 inch of the screw protrudes beyond the face of the stucco. Refer to your mailbox instructions to confirm how much the screw should protrude.
-
Position the mailbox over the screwheads. Align the mounting tabs over the screws and push down to snap into place. The mailbox installation is complete.
The Drip Cap
- One way to improve the curb appeal of your home is to update your mailbox.
- Many mailboxes are mounted on the front wall of the home and are an important part of the overall look of the home.
- Locate the screw positions by referring to your mailbox mounting instructions.
- Use a bubble level to ensure the hole pattern is level.
- Insert the plastic sleeve portion of the hollow-wall anchors into the screw holes.
Writer Bio
Carol Reeves is a licensed architect with more than 12 years of experience in architecture and construction. In 2003 she began writing and editing for local publications, as well as teaching at community colleges. Reeves holds a Bachelor of Architecture from California State Polytechnic University, Pomona.
Photo Credits
- postbox image by Aleksander from Fotolia.com
- postbox image by Aleksander from Fotolia.com
More Articles


