-
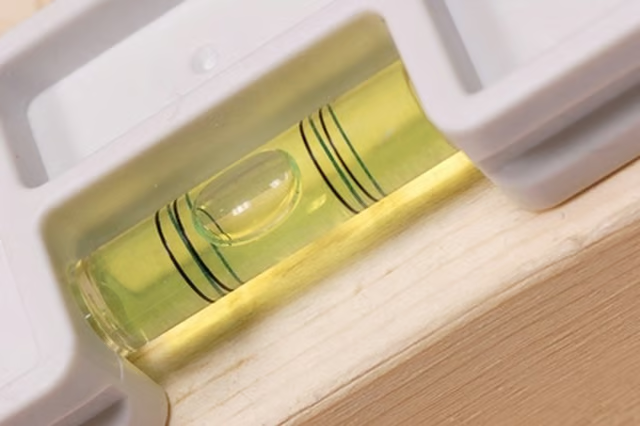
Position a level horizontally on the front of the top of the washer. Note that an air bubble is within the small cylinder of fluid on the level. The air bubble must rest between the two black lines marked on the side of the cylinder. If the air bubble is not within the two black lines, one side of the washer is higher than the other. If the air bubble is closer to the right line, the right side of the washer is higher than the left. Likewise, if the bubble is closer to the left line, the left side of the washer is higher than the right.
-
Access the leveling feet. Tilt the side of the machine that is lower off of the ground a few inches, then position a wood block underneath the washer to support that side off of the ground. For example, if the left side of the washer is lower than the right, raise the left side of the washer to access its leveling feet.
-
Adjust the levelness of the washer. The height of each corner of the washer can be adjusted by twisting the leveling feet by hand either into or out of the washer. Twisting a leveling foot in a clockwise direction will lower that corner, while turning the foot in a counterclockwise direction will raise that corner. For example, if the left side of the washer is lower than the right, turn the two adjustment feet at both corners of the left side of the washer in a counterclockwise direction to raise the left side.
-
Remove the wood block and check the levelness with the level in the same manner described in Step 1. Continue to adjust the leveling feet until the level shows that the washer is level.
-
Position a level horizontally on either side of the top of the washer. Whereas before the washer was adjusted so that each side was level, it must now be checked to determine whether the front of the washer is level with the back of the washer. The adjustment process for leveling the front and the back of the washer is almost identical to adjusting the levelness of the two sides. If the air bubble within the level is closer to the front of the washer, the front of the washer is higher than the back. If the bubble is closer to the back of the washer, the back of the washer is higher than the front. Adjust the feet at the bottom of the washer until the front of the washer is level with the back of the washer.
Articles
View All Hover to load posts
Articles
View All Hover to load posts
Articles
View All Hover to load posts
Articles
View All Hover to load posts
Articles
View All Hover to load posts
Articles
View All Hover to load posts
Articles
View All Hover to load posts
Articles
View All Hover to load posts
Articles
View All Hover to load posts
